- The Book of Betty (11/16/2015)
 “Rainy Days and Mondays” always make me think of warm couches, fires and cookies… So, I drug out my ancient, well, circa 1972, “Betty Crocker Cooky Book” for inspiration. Turning those well thumbed pages, finding the dog eared treasures, with pictures (and greasy finger prints to match) unearthed a flood of warm memories. Oatmeal seemed just the thing to make this rainy Monday perfect. Feeling delightfully lazy, I figured bar cookies were the best thing to create…
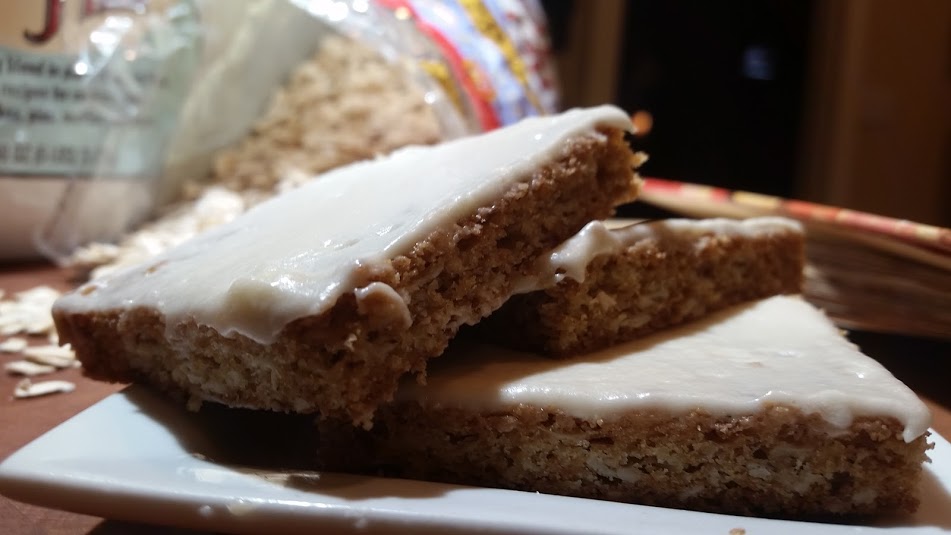
Gluten Free Oat Bars with Maple Buttercream
Cream together:
1 C softened unsalted butter
1/2 C white sugar
1/2 C packed light brown sugar
Add:
2 eggs Continue beating until creamy and smooth
Add:
1 C Redmills 1 to 1 Gluten Free Flour
1 C Gluten Free Rolled Oats
1 tsp Real Vanilla
1 tsp Kosher Salt
When well mixed, add:
1/2 tsp baking soda
1/2 tsp baking powder
Just make sure these are mixed in thoroughly. Don’t over mix at this point.
Spread the soft dough across a lipped baking sheet that you have greased with either butter or a light coating of Olive Oil pan spray. Place into a preheated 350 degree oven for approximately 12-14 minutes, or until the top browns and the cookies begin feeling firm. Remember, these will continue to cook in the hot pan after you take them out of the oven. Of course, if you want your cookies crisp, you are welcome to cook them a bit more. It’s up to you! When they are done, place on a rack to cool.
The buttercream is super easy:
1 1/2 C powdered sugar
1/4 C softened butter
1/2 C Real maple syrup
Toss this all into the mixer and whip until smooth and creamy. Spread over the cooled cookies. When the buttercream is set, cut the cookies into whatever shape and size that makes you smile. Enjoy your Monday!
Thanks for visiting Fearless Feast! Chef Celinda
- Love and Lies (2/2/2015)
 Is it a bad thing to fool your special someone by feeding them things that are good for them without their knowledge?? You know how they love spectacular desserts and just should NOT be eating Gluten, but…
You have probably looked at the gluten free treats at the grocery store. You ponder, wondering if they will taste good. At that price, you sure do hope so, but probably don’t have a great deal of faith…
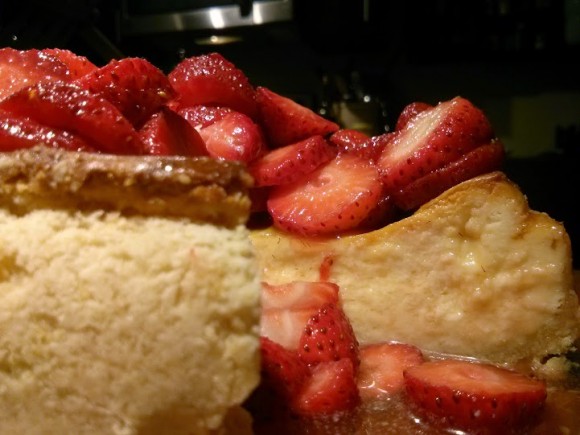
This pretty cheesecake is well within your ability. You need a good mixer, a spring form pan and fresh cream cheese.
This recipe was made for a 6" spring form pan. The crust recipe included, is enough for two cakes or one larger, 9" spring form pan. I put the remaining dough into the freezer for my next baking expedition!
If you are using a conventional oven, you need to take some extra steps to prep your pan. The butter in the crust will potentially melt, dripping down on the element and start a fire. In a convection oven, there is no exposed element, so not a problem. I do like to place a pan in the bottom of my convection oven, to catch drips and make cleanup easy, though. Of course, you can also use the upcoming method to handle drips, too. To create a seal for conventional cooking, wrap plastic wrap around the exterior of the assembled pan, creating a barrier to prevent leaks. You do not want it sticking up over the top edge, so tuck it neatly. Now, wrap foil around the plastic, with the thought of stopping leaks, also, but primarily to protect the plastic from the heat as well as creating a secondary catch point. The plastic will shrink from the heat, but honestly, it should do a great job. If you are further concerned, place a pan or dish under the spring form, too. This is fine, but it could make it take a little longer to bake in a conventional oven.
Once you are done sealing your pan, use a light coating of oil on the inside, for ease of release and for the crust crumb to stick to.
If using a conventional oven, set to 350; 325 for convection.
Crust:
1 C Red Mill 1 to 1 Gluten Free flour
1/3 C sugar
6 T cold unsalted butter, cubed
1 egg yolk
Dash of saltUsing the paddle attachment, mix together all the ingredients until you have formed a consistent petite pea sized crumb. Do not over mix!! Honestly, if that happens and it forms a dough, you are best to start over. You can save the screw up batch and make some cookies, but it will have a tough texture, if you try to use it for your cheesecake.
Place the finished crumb in the pan. If doing a six or seven inch spring form, put the other half in a freezer bag and store for another day. Now, carefully press the crumb all the way up the sides and across the bottom, using your fingers. If it is sticking to you, run your fingers under cold water to cool them, dry and dust with a little of your gluten free flour. It is very important to get the crust an even thickness on the entire surface. The largest pitfall is the corner where the sides meet the bottom. Push with your finger tips to thin it, if you realize you have created a slope instead of a sharp corner. If you don’t your finished cheesecake will have an unappealing block of crust in each piece. Set your crust in the fridge until you are ready to fill and bake.
To make the filling:
1 lb FRESH, good quality cream cheese. Do not cheap out and do check the date. As it ages, it loses moisture. You will end up with a cheesecake dotted with dry morsels of cheese no matter how much you whip it.
2 eggs
1/2 C sugar
1 tsp real vanilla
zest from half of a lemonPlace all the filling ingredients into your mixer with the whip attachment. Whip until fluffy and smooth. Carefully spoon into your prepared crust. Push it up against the sides in a way that you do not knock the crumbles loose and smooth the top. It will be fairly full. Place in the preheated oven. The cake will take roughly an hour. It’s done when a toothpick comes out clean from the center. If the top is beginning to get too brown, place a loose foil tent over it for the final baking.
Once fully cooled on a rack, carefully remove the spring form pieces. You can simply dust with powdered sugar and serve or use your favorite gluten free topping. The pictured cake has fresh strawberries in pineapple glaze. This is super easy and the combined acid and sweetness of the pineapple will give you the flavor that may not be in the berries coming in at this time of year. Simply reduce the pineapple juice. Add more sugar if your berries are particularly sour. Cool for a few minutes then fold into sliced berries. For a thicker glaze, add some dissolved gelatin before mixing with the berries. For an extra pretty batch, you can also add red food coloring.
- Liquid Love (1/21/2015)
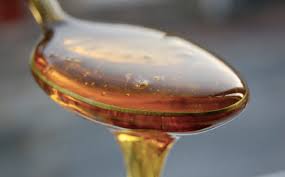
Agave nectar is roughly 1.5 times the sweetness of sugar. Being comprised of fructrose instead of sucrose, agave nectar has a lower glycemic index. In moderation, it is felt to be potentially a healthier option.
You can use agave in any recipe calling for honey. Differing degrees of processing result in varied grades of finished product. You will find light agave to have a fairly neutral flavor. Amber agave contains subtle caramel notes. These flavors increase in darker agave. My experience is mostly with light agave.
When baking with agave, in addition to moisture modifications if it is substituted for sugar, you also need to cook at a lower temperature. Agave browns more quickly.
Play with agave nectar in your kitchen. With it’s ease of addition, due to liquidity, it’s an easy choice when a dish needs just a touch of sweetness to balance other flavors. Light syrups add no flavor.
I understand agave nectar is a dream to caramelize, as well, being already liquid. It works beautifully in vinaigrette or as the sweet in a tantalizing gastrique.
Of course, should you be in the mood… it is incredible in my favorite fresh grapefruit margaritas. Enjoy! Chef Celinda
- Tree Full of Sugar (1/21/2015)

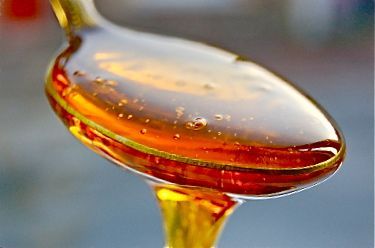
Maple syrup, the real deal, of course, is an intriguing addition to a variety of dishes.When purchasing, I like to find Grade B maple syrup. This is darker, richer, and less refined. Grade A is lighter in color and flavor.
“The sugar maple tree (Acer saccharum) grows abundantly in the northeastern part of North America. Sugar maples produce strong, versatile timber and yield maple syrup – both commodities contribute considerably to the economy of the region.” wikiHow has a great article on identifying Sugar Maple trees. I’ve never tried it, but understand it is possible to harvest this beautiful substance in other parts of the country, as well.
The primary ‘sugar’ in maple syrup is Sucrose, yet we don’t fully comprehend the chemistry behind the flavor.
 If you are using maple syrup, in baking, be aware that the liquid will cause chemical changes in the overall dish, so you need to make careful modifications. This is true of any liquid based sweet.
For use in savory dishes, try maple with Brussels Sprouts, Carrots, Chilis, Corn, Rice, Winter Squashes, Turnips or Sweet Potatoes. I’ve found it to lend subtle, enticing flavors to braised short ribs. It is also a favorite for braising pork belly. For true culinary evil, I have been known to use it in vinaigrettes. Add to salads featuring fresh or dried pears, pecans or walnuts.
Give maple syrup a new place in your kitchen. Don’t relegate it merely to the occasional extravagant breakfast or brunch! This sweet thing likes to play with the Big Boys, too!
Enjoy! Chef Celinda