- The Book of Betty (11/16/2015)
 “Rainy Days and Mondays” always make me think of warm couches, fires and cookies… So, I drug out my ancient, well, circa 1972, “Betty Crocker Cooky Book” for inspiration. Turning those well thumbed pages, finding the dog eared treasures, with pictures (and greasy finger prints to match) unearthed a flood of warm memories. Oatmeal seemed just the thing to make this rainy Monday perfect. Feeling delightfully lazy, I figured bar cookies were the best thing to create…
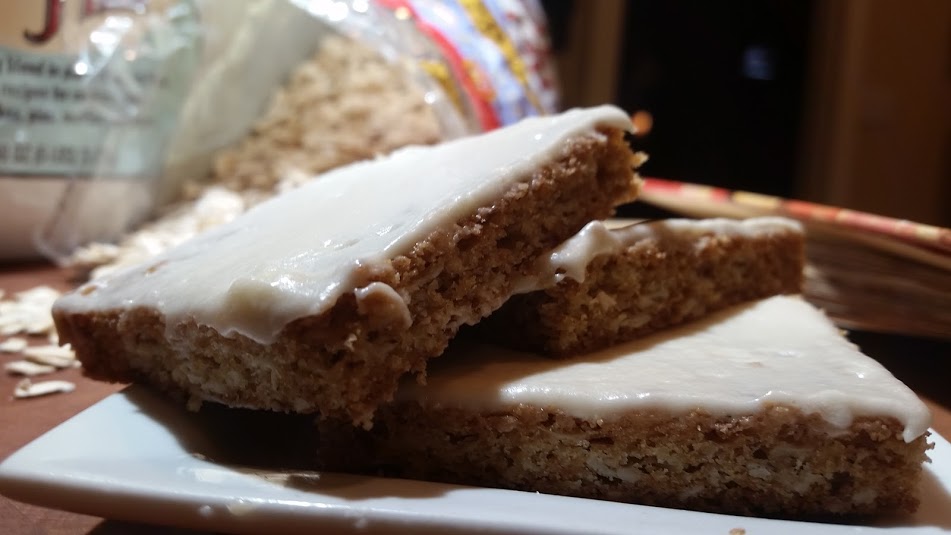
Gluten Free Oat Bars with Maple Buttercream
Cream together:
1 C softened unsalted butter
1/2 C white sugar
1/2 C packed light brown sugar
Add:
2 eggs Continue beating until creamy and smooth
Add:
1 C Redmills 1 to 1 Gluten Free Flour
1 C Gluten Free Rolled Oats
1 tsp Real Vanilla
1 tsp Kosher Salt
When well mixed, add:
1/2 tsp baking soda
1/2 tsp baking powder
Just make sure these are mixed in thoroughly. Don’t over mix at this point.
Spread the soft dough across a lipped baking sheet that you have greased with either butter or a light coating of Olive Oil pan spray. Place into a preheated 350 degree oven for approximately 12-14 minutes, or until the top browns and the cookies begin feeling firm. Remember, these will continue to cook in the hot pan after you take them out of the oven. Of course, if you want your cookies crisp, you are welcome to cook them a bit more. It’s up to you! When they are done, place on a rack to cool.
The buttercream is super easy:
1 1/2 C powdered sugar
1/4 C softened butter
1/2 C Real maple syrup
Toss this all into the mixer and whip until smooth and creamy. Spread over the cooled cookies. When the buttercream is set, cut the cookies into whatever shape and size that makes you smile. Enjoy your Monday!
Thanks for visiting Fearless Feast! Chef Celinda
- Mi Masa Su Masa (4/20/2015)

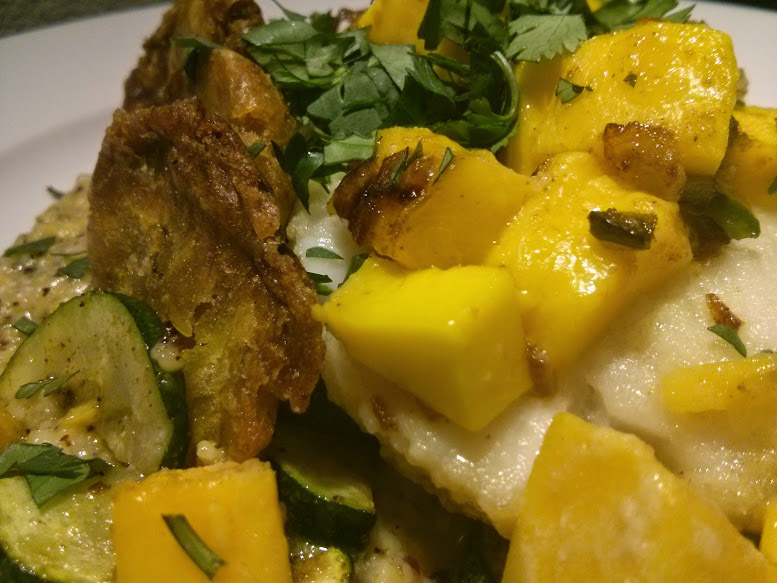
So many gluten free flour blends are heavy with rice flour. These tend to magnify my waistline… A perusal of my pantry turned up a lovely bag of masa harina; corn that has been soaked in lime, then ground into a flour. This made a spectacular light coating for the long-line rockfish I picked up at Town & Country’s Central Market in Shoreline today.Cut your fish into serving size pieces, salt each side and dust lightly with the masa. Brown on each side in hot olive oil. Top with a mixture of fresh mango and minced jalapeno. Pop into a preheated 400 degree oven. You want to cook rockfish fully. It will be flaky, white throughout and no longer opaque.
To complete my theme I served the delicate fish with Abenaki’s Corn Polenta. I picked up this beautiful multi-hued polenta from the people that grow the corn, grind it with utmost care and then sell it at the Eugene, Oregon farmer’s market a few weeks ago. This is some of the best polenta I have encountered, to date. I cooked it with fresh stock and a squeeze of lime to bring out the lovely corn flavor. Check out their website www.lonesomewhistlefarm.com
For some fun texture I made my own version of tostones; double fried green plantain. Simply score the plantain down each side, snip the ends and pop into the microwave until soft and the skin is dark brown/black. One large plantain took about three and a half minutes in my microwave. Once the fruit is soft, let it cool just enough to handle and remove the skin. Cut into 12-14 rounds. The recipes I’ve seen call for all manner of methods to ‘smash’ the rounds, but being a chef with ‘cast-iron’ hands (who needs fingerprints, anyway!) I placed them between two pieces of wax paper and smooshed them fairly flat with the heel of my hand. You could use a glass, a plate, a pan, whatever is handy. Now fry them on one side in olive oil in a cast iron pan. Turn them over in the oil and place the pan into your 400 degree oven with the fish, until they are done. I made mine fairly crisp, but do them how ever you prefer. They can even be cooked extra crisp and served with a dip for a fun appetizer.
Some zucchini sauteed with World Spice’s Caribbean Curry and a bit of fresh minced cilantro to finish! It was VERY quiet around the dinner table at my house!
Enjoy!! Chef Celinda - Goddess of Green Things (3/30/2015)
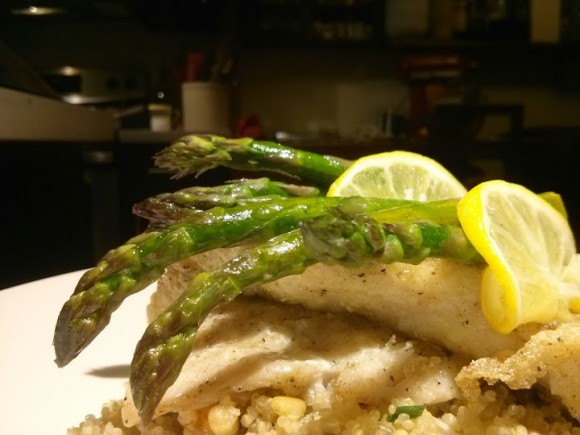
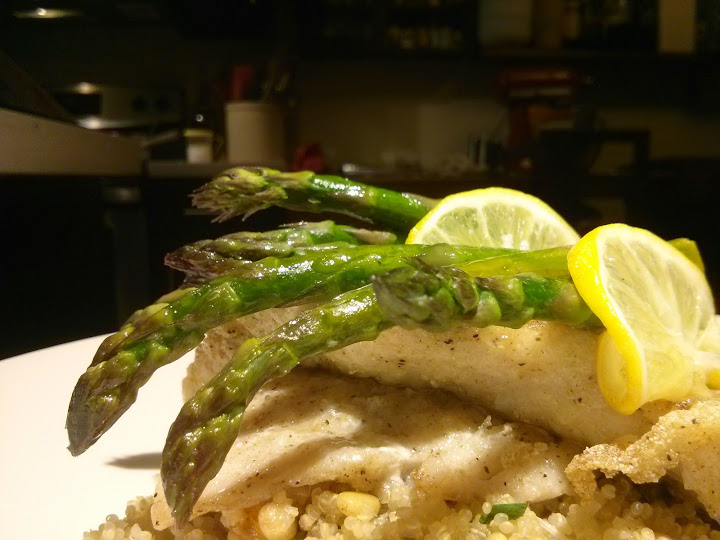
Want to be a Goddess? Read on! Fresh, vibrant vegetables are trickling into our markets. It just takes an understanding of flavors and a deft touch while cooking these glorious examples of Spring bounty to bring your dinner guest to rapturous delight.Little could be simpler to prepare then the beautiful asparagus pictured above.
1 bunch of asparagus, washed and bottoms snapped off
2 Tbsp unsalted butter, cold, cut in thin slices
Sliced of fresh Meyer or regular lemon
Fleur de selArrange the asparagus in a baking dish. Place the slices of butter across the middle of the stalks. Layer the slices of lemon on top of the butter. Sprinkle all with fleur de sel and pop into a 350 degree oven for about 15-20 minutes. Keep on eye on the asparagus. Once the color starts to brighten, test for tenderness. As soon as it reaches the level you prefer, remove from the oven. It’s ready to serve.
The dish pictured shows the pretty asparagus served with fresh Rockfish seasoned with tarragon and minced orange zest on top of quinoa studded with roasted pine nuts, scallion and julienne morsels of dried mandarin orange. Once the asparagus was happily balanced across the fish, I poured the resulting butter over the whole.
Gluten Free, as always!! Enjoy! Chef Celinda
- Silver for the King (2/22/2015)
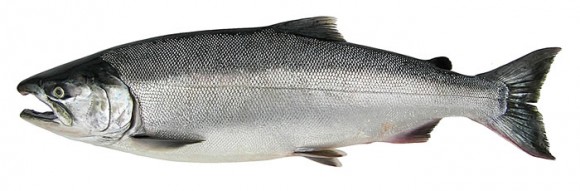
 Pretty, wild Silver, also known as Coho, Alaskan salmon is incredible when prepared with dense, flavorful King Oyster mushrooms.
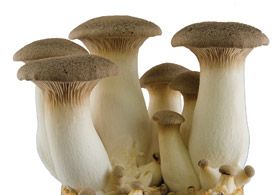
This variety of mushroom combines the flavor, we love, of the oyster mushroom, with a dense meatiness that adds incredible texture to your dish. You will find them to willlingly avail themselves of the flavors you introduce in the pan. Tonight, I chose to saute them in butter with shallot and cardamom. When they were sufficiently softened, I deglazed with Oloroso sherry, then a touch of maple syrup, the sweetness balanced by Jerez sherry vinegar.Coco, or Silver salmon are frequently found at a much better price in your fish market. Being a smaller fish, you need to handle them pretty gently, when cooking. They can dry out in a heartbeat! Keep a close eye on them as you pan roast, poach or oven roast this wonderful fish.
For those of you seeking to keep your diet free of allergens, fresh wild salmon is an excellent choice. Firm fish, like salmon, do not need a coating, as do more delicate fish, like sole. This means, you can usually count on it as a Gluten Free option on restaurant menus. Do carefully read the menu description, though. Ask you server, to be sure it is safe. At home, Salmon is wonderful with so many flavors, sauces, cooking styles and accompaniments. Be creative! Enjoy! Chef Celinda
- Gluten Border Patrol (2/21/2015)
 Satisfying your craving for amazing Mexican dishes should not require a run in with the Gluten Border Patrol!
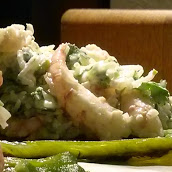
By using one of our great choices, in gluten free flour, it is simple to create many of the dishes you are lusting after!
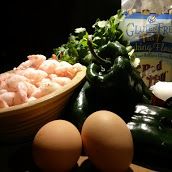
Try my Shrimp and Lime filled Chili Rellenos. They take some time, but aren’t difficult.
2 Poblano peppers per person, or one, for smaller appetites
Sweet shrimp, peeled
Fresh Lime
Chevre
White or Brown Rice, prepared
Cilantro, chopped
Green Onion, minced
Shallot, minced
Garlic, minced
Organic tomato sauce
Olive oil
Cumin
Coriander
Cayenne or other favorite powdered chili
Salt and Pepper
Egg
Gluten free flour: I prefer Redmill 1 to 1 baking flourThe Peppers:
Using the broiler or over a gas flame, burn the skin of the poblano peppers. Wrap in paper towel or a paper bag to steam the skins loose. When cool, remove all of the skin. Remove the top and seeds. The peppers can be fragile, so do so gently. If one splits, don’t fret, toothpicks can work magic. Place the opened, prepped peppers on waxed paper and set aside.The Sauce:
Place olive oil and shallot in a sauce pan. When wilted, add garlic, ground cumin and coriander. When done, add the tomato sauce, cayenne, salt and pepper. Once warmed through, add the juice from half a lime and simmer. Keep an eye on the liquid level. You may need to add a few tablespoons of water.The Filling:
If shrimp are frozen, thaw under cold running water, then mix together the shrimp, some of the chevre, a few tablespoons of prepared rice, chopped cilantro, lime zest, juice from the other half of the lime, salt and pepper.To Stuff the Peppers:
Place the shrimp filling on the roasted, opened pepper. Wrap the cut sides around the filling and secure with a toothpick. If you have additional splits in the pepper, secure those, as well. Once you have filled all the peppers, prepare them for frying. Beat the eggs in a bowl large enough to hold a pepper, too. Add a tablespoon, or two of cold water and mix. Place some gluten free flour in another, equally sized bowl. Dip each pepper in, first the egg, then the flour and set on a plate or waxed paper. Once you have coated all the peppers, heat some olive oil in a stout bottomed pan. When hot, carefully place one or more peppers in the oil and cook each side until lightly browned. Set aside to cool. When all the peppers are browned, carefully remove all the toothpicks. They should stay together nicely.To put the dish together:
Ladle some of the sauce into the bottom of a baking dish. Place the browned peppers neatly on top of the sauce. Put the rest of the sauce across the peppers and garnish with the remainder of the chevre. Pop into a 350 degree oven. Cook for about 45 minutes, or until bubbly and the cheese is lightly browned.The side dish:
Mix warm prepared rice with chopped cilantro, green onion, melted butter or olive oil and desired seasoning. Place rice on the plate and top with one or two of the finished rellenos.Serve to family and friends. You have no reason to tell them they are gluten free. They will never know! In fact, they will probably suggest you open a Mexican restaurant! Enjoy! Chef Celinda
- Love and Lies (2/2/2015)
 Is it a bad thing to fool your special someone by feeding them things that are good for them without their knowledge?? You know how they love spectacular desserts and just should NOT be eating Gluten, but…
You have probably looked at the gluten free treats at the grocery store. You ponder, wondering if they will taste good. At that price, you sure do hope so, but probably don’t have a great deal of faith…
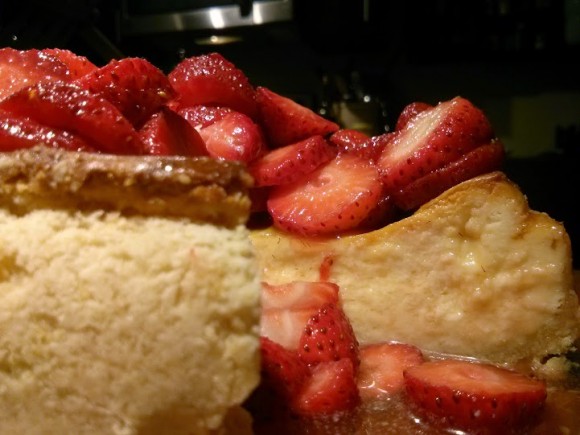
This pretty cheesecake is well within your ability. You need a good mixer, a spring form pan and fresh cream cheese.
This recipe was made for a 6" spring form pan. The crust recipe included, is enough for two cakes or one larger, 9" spring form pan. I put the remaining dough into the freezer for my next baking expedition!
If you are using a conventional oven, you need to take some extra steps to prep your pan. The butter in the crust will potentially melt, dripping down on the element and start a fire. In a convection oven, there is no exposed element, so not a problem. I do like to place a pan in the bottom of my convection oven, to catch drips and make cleanup easy, though. Of course, you can also use the upcoming method to handle drips, too. To create a seal for conventional cooking, wrap plastic wrap around the exterior of the assembled pan, creating a barrier to prevent leaks. You do not want it sticking up over the top edge, so tuck it neatly. Now, wrap foil around the plastic, with the thought of stopping leaks, also, but primarily to protect the plastic from the heat as well as creating a secondary catch point. The plastic will shrink from the heat, but honestly, it should do a great job. If you are further concerned, place a pan or dish under the spring form, too. This is fine, but it could make it take a little longer to bake in a conventional oven.
Once you are done sealing your pan, use a light coating of oil on the inside, for ease of release and for the crust crumb to stick to.
If using a conventional oven, set to 350; 325 for convection.
Crust:
1 C Red Mill 1 to 1 Gluten Free flour
1/3 C sugar
6 T cold unsalted butter, cubed
1 egg yolk
Dash of saltUsing the paddle attachment, mix together all the ingredients until you have formed a consistent petite pea sized crumb. Do not over mix!! Honestly, if that happens and it forms a dough, you are best to start over. You can save the screw up batch and make some cookies, but it will have a tough texture, if you try to use it for your cheesecake.
Place the finished crumb in the pan. If doing a six or seven inch spring form, put the other half in a freezer bag and store for another day. Now, carefully press the crumb all the way up the sides and across the bottom, using your fingers. If it is sticking to you, run your fingers under cold water to cool them, dry and dust with a little of your gluten free flour. It is very important to get the crust an even thickness on the entire surface. The largest pitfall is the corner where the sides meet the bottom. Push with your finger tips to thin it, if you realize you have created a slope instead of a sharp corner. If you don’t your finished cheesecake will have an unappealing block of crust in each piece. Set your crust in the fridge until you are ready to fill and bake.
To make the filling:
1 lb FRESH, good quality cream cheese. Do not cheap out and do check the date. As it ages, it loses moisture. You will end up with a cheesecake dotted with dry morsels of cheese no matter how much you whip it.
2 eggs
1/2 C sugar
1 tsp real vanilla
zest from half of a lemonPlace all the filling ingredients into your mixer with the whip attachment. Whip until fluffy and smooth. Carefully spoon into your prepared crust. Push it up against the sides in a way that you do not knock the crumbles loose and smooth the top. It will be fairly full. Place in the preheated oven. The cake will take roughly an hour. It’s done when a toothpick comes out clean from the center. If the top is beginning to get too brown, place a loose foil tent over it for the final baking.
Once fully cooled on a rack, carefully remove the spring form pieces. You can simply dust with powdered sugar and serve or use your favorite gluten free topping. The pictured cake has fresh strawberries in pineapple glaze. This is super easy and the combined acid and sweetness of the pineapple will give you the flavor that may not be in the berries coming in at this time of year. Simply reduce the pineapple juice. Add more sugar if your berries are particularly sour. Cool for a few minutes then fold into sliced berries. For a thicker glaze, add some dissolved gelatin before mixing with the berries. For an extra pretty batch, you can also add red food coloring.